Hello Everyone, I've decided to write a "series" of sorts about some easy/inexpensive holiday gifts that you can make this year. These are things that I will actually be making this year, for some of our friends (sorry- cat's out of the bag, guys!)
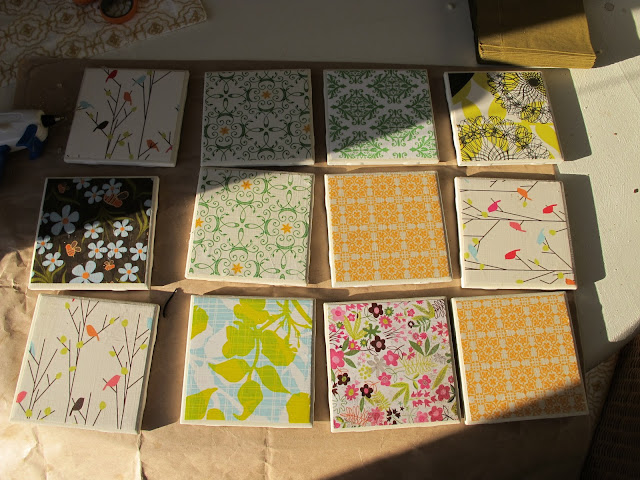
Anyway, first up we have coasters. Everyone can (should) use coasters. I used to not be much of a coaster gal myself, but my hubs is big on coaster-use and trained me into the habit. Unfortunately, I could never find any cute coasters that were cheap, so we had some ugly boring ones for a loooong time. Then one day, I decided to make some coasters for our home and lo-and-behold, I ended up with this:
Cute, no?
Anyway, I digress. This year I want to show a step-by-step guide for making these coasters. You need the following items:
- mod podge (I prefer the gloss version that comes with a green label)
- craft paper
- white 4x4 inch tiles (you can get a similar style at The Depot, like these for cheap-cheap, or if you have a Room of Requirement like us, ask and you shall receive)
- felt
- a glue gun
- a foam brush (a regular paintbrush works fine also)
- scissors
- probably a pencil and a ruler (unless you're super awesome at cutting straight lines, freehand)
Okay, now that you've assembled your tools, let the fun begin. First choose the craft papers you want to use. I like to give the coasters in a set of coordinating- yet all different designs (hopefully my friends like receiving them too!), but you can always choose one paper to make a matching set of coasters.
Next, measure and cut your paper of choice into squares to fit on the top of the tile. I like to have a little frame of white showing, so I trim my paper slightly on the small side, but again it's up to you.
Next, apply a thin layer of mod podge to the top of each tile and affix paper on the tile.Smooth out any air pockets with you fingers (no one likes bumpy coasters!)
Wait about 20 minutes for the mod podge to dry. If you try to seal the paper too soon, you'll end up with a very bumpy coaster. Then, apply two or three thin coats of mod podge over the top of the paper. Wait about 20 minutes (or until they are dry to touch) in between each coat.
While waiting for mine to dry, I washed the 10 million cereal bowls and 500 tea cups that had mysteriously piled up in our sink...
I let my tiles dry overnight, this way any air pockets will settle down and they won't be tacky at all for the next step (now, if you chose ugly paper, there's nothing I can do to help you with that, your tiles will remain tacky... I'm just kidding, I mean sticky). However, if you're short on time, a couple hours of drying should suffice.
Now, heat up your glue gun and flip all your tiles over. Since the tiles are rough on the back, you want to add some felt so that the coaster don't scratch up your friends' coffee tables. (I assure you, your gifts will be less well-received if you skip this step!) Cut out squares of felt, large enough to cover the bumpy parts of the tiles. Glue the felt on with your glue gun.
Then.... you're finished! Easy, huh?
Wrap up your tiles with a cute ribbon, and voila- you have a fun little gift to give to your friends for the holidays (or make for yourself). The next installment of this series will be a little something-something to coordinate with coasters, so keep your mod podge handy!


No comments:
Post a Comment
Did you enjoy this post? Leave a comment below and let us know what you thought!