6.29.2012

organizing baby clothes

After three baby showers(!!) we had plenty of clothes and blankets - enough for Teeny-Tiny to have multiple outfit changes each day. This week, my plan was to wash, organize, and put away every last baby item we had received. 
The first thing I did was sort all the clothes into lights and darks. I did several loads of laundry using water and white vinegar rather than detergent. The clothes came out of the laundry extra soft and odor-free. 
After washing everything, I folded all those itty-bitty clothes and put them into piles based on function and size. Onesies, pants, and sleepers all went in separate piles.  I made stacks of newborn, 3 month, and 6 month clothes. 
Next, I readied the dresser for all those cute little clothes. Since the dresser used to hold office supplies, the drawers weren't lined. I decided to line the drawers with a cute wrapping paper found at Target. 
First I cleaned out all the drawers using a microfiber dust cloth.

Then I measured the drawers and cut my paper to size.
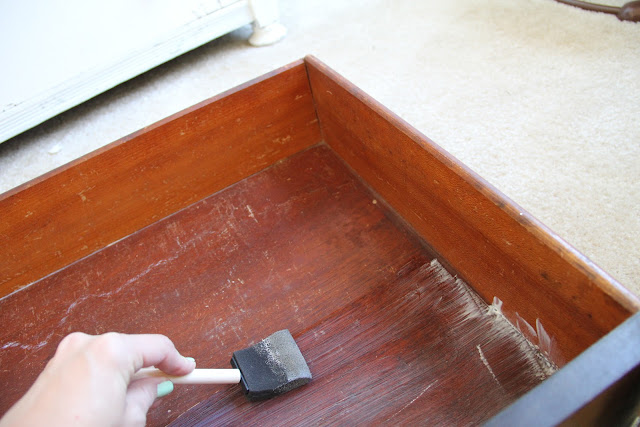
Next, I applied a thin layer of mod podge to the inside of each drawer and laid the paper on top. The thin paper wrinkled up a little at first but as soon as the mod podge dried, it smoothed out. 
After all the drawers were lined, I added drawer dividers from Bed Bath and Beyond, so that the small clothes wouldn't be floating around messily in the drawers. 
 I also made these cute labels to describe what goes in each drawer. I felt like our future sleep-deprived selves could use this little organization tactic to help us remember what goes where!
I lined the second dresser as well since we'll be using this one for our changing station. I put diapers and wipes in the top two drawers where they'll be easily accessible. 

So that's how I organized everything in baby's room... Now if only everything else was finished in there! 

6.28.2012

34/showered

 We have been so blessed to have so many people that care about us and little mister Teeny-Tiny. We had three baby showers thrown in his honor over the past couple months. The first shower was held at work and we were given tons of cute baby clothes. The second shower was on the 16th of June and was given by my mother-in-law and sister-in-law. Again we were given so many cute baby items and enjoyed delicious food and cake. Sadly I got no pictures of that event. 
Our third and final shower was held last Saturday and was hosted by my mom, sister, aunt, and a couple of my mom's best friends. It was less of shower and more of a party with the men included. Check out the pretty decorations that everyone put together: 
 We received so many adorable gifts from friends and family and plenty of useful items that we still needed from our registry.
 All three events were so much fun and all the gifts definitely helped us feel more prepared for little man's impending arrival! Thanks so much to everyone who organized these lovely events.
Thanks to Paul, Cathy, and Emily for all the pictures since I obviously took none of my own!  

6.27.2012

we love our little lawn

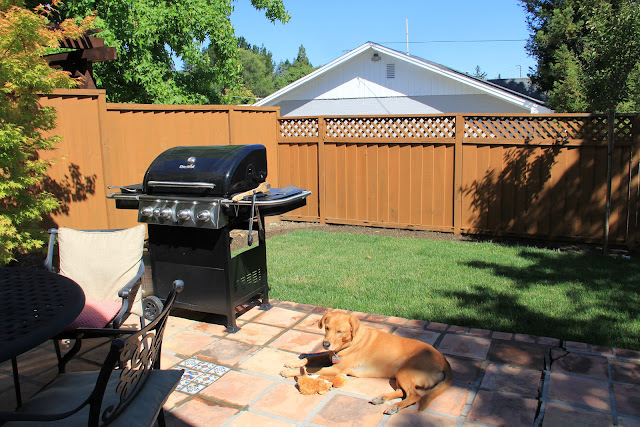
As I mentioned in this post, we now have grass in our yard! Such an exciting moment! I came home from work two weeks ago, and Jason was just finishing up our beautiful new lawn. It's crazy how different the yard looks with a little bit of green, rather than piles and piles of dirt. Right now the lawn is L-shaped around the patio with straight edges. The next step is to add some gentle curves to it to create the flower beds next to the fence.  Luckily, we've been under budget so far so we have some money to spend on plants and flowers this summer. (We originally thought those things might wait until next year). 
 
We have been watering our lawn like crazy so that it doesn't die in this 100 + degree heat and we've been under strict orders to stay off of it for 2 weeks. This make Lucy very sad... She often stands at the glass door, looking out and just hoping we'll let her our on the new grass.
Just to remind you how far we've come, here's what things looked like before we started this project:  
So, that's the yard update for now! We're in the home stretch and the next time I update you, we'll probably have the plants in the ground! 

6.25.2012

almost done!

My dad surprised me by working on the bathroom last Friday while I was at work. Since we already painted the walls, installed the light, and added flooring, he had four main projects to accomplish in there.
 First, he added baseboards and trim to the wainscoting, to finish it off. (Which translates to lots of sanding, spackling and painting for moi.) 
 Next, he added the recessed shelves that went into the hole left by the medicine cabinet. He built the insert at home and then added the trim around the box when he got to our house. It looks so much better than that mirrored cabinet.
Then he worked on the electrical. We originally had one switch that turned on the light and (noisy) fan at the same time. When he asked us if we wanted two switches so that fan didn't have to be on all the time, we were quick to agree. However, the job was less than straightforward. Apparently the switch in the bathroom also controlled some of the outlets in the bedroom and there were more wires than necessary in the box. Of course, he figured it out and got everything working properly!

Last, Dad installed a new sink on top of the existing vanity. To save money, I opted to paint the vanity a fun aqua/blue color, instead of replacing it. The blue is so cheerful against the whites and grays of the room and the new sink is a huge improvement over the previous one. My dad also put the toilet back in it's place.
A lot has been accomplished in there and it's about 90% complete. The last few things remaining on the list are:

  • Patch the nail holes, sand, and paint both the recessed shelves and the wainscoting. 
  • Hang the mirror above the sink 
  • Scrape off any glue residue left behind by the removal of the shower door 
  • Add a couple more pieces of trim to cover up any gaps 
  •  Accessorize and decorate! (Obviously, my favorite step!) 
 Now that I'm done with work, I think our projects will move a bit quicker around here! 


6.22.2012

yay couch

After months of waiting (well years if you count all the time I wished I had a new couch), we finally have our new couch at home! And we love it! It's so much more comfortable than our old couch and it fits the space so much better. The old couch was longer. This couch is shorter but much deeper. I really like the light linen slipcover and how fitted it is. 
Since our old couch pillows were a similar color to the slipcover, they don't work on this couch any more so I'm looking for some replacements. Although I'm not really sure of the color or style yet.
 Of course we always have more ideas up our sleeves but I am already pleased with the evolution of our living room over the past month and a half:


6.21.2012

moving into the 21st century

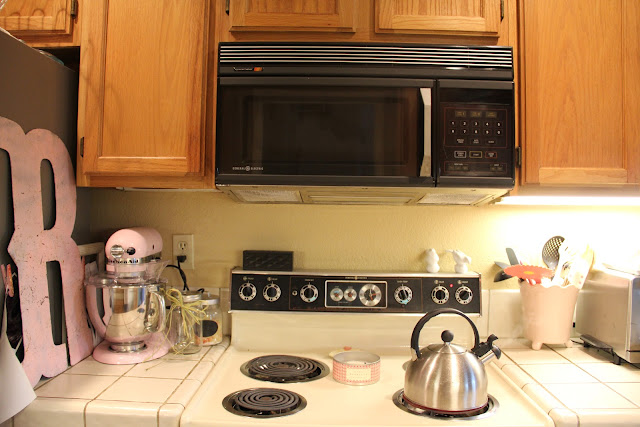
When we moved in to our house, we purchased a refrigerator and washer/dryer since neither of those came with the house. As much as we wanted to update all the 80s appliances, we decided to save our money now and purchase those down the road. So, we were left with a gorgeous oven and built-in microwave circa 1985. 
 The first dinner that I made in our new house included some tortillas that I wanted to warm in the microwave. After 3 rounds in the microwave, they were still cold and I realized that it wasn't actually working. Nick checked the home inspection and sure enough, we missed the part that stated that the microwave was non-functioning.

It looked like our new microwave was coming sooner than we thought. Since we aren't big microwavers to begin with, we lived without one for awhile, until Nick finally decided it was time to purchase one. We ordered a stainless steel one to match the fridge and eventually the oven. Unfortunately it was back-ordered so we lived without a microwave for five weeks, which is more of an occasional minor annoyance than a catastrophe. 
Finally, two weeks ago the Kitchen Aid people came to deliver and install our new microwave. It looks so much better than the old guy, although it's quite large for the space. We're hoping that when we makeover the kitchen, we can extend the length of the cabinets to match the microwave, by adding some trim around the bottom. A different project for a different day...
Now the only ugly duckling left is the stove, which actually works very well. With no reason, other than aesthetic to make a change,  I think it will be sticking around for awhile... However, when we do purchase one, it'll be this one: 


Someday... 

6.20.2012

peel and stick

When we decided to re-do Baby's bathroom, one of the must dos on the list was a new floor. The previous floor was chicken-nasty linoleum (the kind you scrub and scrub and it never looks clean). We decided that an affordable option would be peel and stick tiles. They come in a box of 20 tiles for a little less than $20 at Lowes. We went with a natural stone looking tile, since we just wanted the floor to look nice and not be a show-stealer in the bathroom. 
I laid the floor by myself, since the directions made it look pretty easy. (I wore a mask and gloves for anyone worried - like my husband was- about fumes from the adhesive.) The first thing I did was clean the floor really well by sweeping and dry dusting. I didn't mop, because your floor needs to be completely dry before you start. Next, I used a putty knife to scrape off any big drops of paint that had fallen during the painting stage of the process. I left the drops that were flush with the floor, since I knew they wouldn't cause an uneven surface. 
My dad suggested starting the corner where the bathtub meets the wall and moving outward toward the  doorway. The directions on the box say to start in the center of the room and move outward. I followed my dad's advice, since it seemed like the easier of the two choices. I laid the first tile down as close to the wall and bathtub as I could get it and used my level to make sure it was in straight. Then I just continued along the line of the bathtub. 

The tiles are very sticky, so it's a good idea to make sure that you're ready to put the tile down as soon as you pull off the paper backing. Luckily, they aren't too sticky that you can't pull them up after they're down. A couple of tiles weren't quite level when they went down, so I used the putty knife to pry them up and re-stick them. 
I left all the cuts until the end, filling in the rest of the room with as many whole tiles as I could use. To cut the tile, I used a regular old utility knife with a razor blade. I changed the blade several times during the process, to make sure it stayed sharp for cutting. To make my cuts, I would lay out a whole tile and then use a pencil to mark where the cuts needed to be made. I would then use the level as a guideline and make several deep cuts along the same line. The knife wouldn't cut all the way through the tile alone, so after several cuts, I was able to just snap the cut-out piece off. (Kind of like a perforated edge.)  A lot of the cuts weren't perfect 90-degree angles, but every single cut would be hidden by a base board or carpet transition, so I wasn't too concerned.
  This would have been a one-day, 2 hour job but I ran out of tiles. We needed 4 more tiles than were supplied in the box. Luckily, Lowes also sells the tiles loosely for 88 cents so we picked up the remaining tiles that night and I was able to finish the project the next day. It's not perfect, but it is definitely an improvement in the flooring. 
Related Posts Plugin for WordPress, Blogger...
 
site design by designer blogs