1.31.2011

Life's a stage...

And, so are our windows apparently...
Let me back up. In a curtain-making phase, I took another trip to the fabric store this past weekend to make some more curtains, this time for our living room balcony doors. I didn't want anything too busy, nor did I want anything too boring so I settled on this pale blue fabric.
Thanks to some couponing, I got 6 yards of this fabric for $14!
Anyway, I proceeded to make 2 window panels, using the exact same methods I detailed here. This a picture of the space we were focusing on, pre-curtains. We wanted the curtains to add a little interest to the wall and to block the sunlight-glare on the TV during especially bright mornings. 
We decided to use one curtain rod and two panels on either side of the doors, since the wall space between them is so narrow. I got the longest rod Target had to offer (120 inches), since the space measured 113 from  door to door. 
Looking good so far. Then Nick and I added the curtains.... The first thing I thought of was a stage. I think it's the extra-long rod and the curtains framing the doors, but I couldn't get the image of a stage out of my mind. Nick doesn't agree with me at all and he likes the curtains, and the glare-protection they offer our TV... I'm not sure I'm convinced yet...
What do you think? Does it remind you of a stage as well? Or, do you think I'm crazy, and they really just look like curtains?

1.28.2011

A Bold Move

Happy Friday Everyone! Today I am completing the new kitchen nook reveal, with a look at our built-in shelves in the room. Here's a little before shot of what we had going on:
We really like the open shelves, and the little arch at the top that mimics the archways throughout the rest of our home. As you can see, in the unpacking process, we placed pretty much anything and everything decorative up there, without too much thought on placement.  I wanted this little area to stand out more, so I decided to paint it a bold color. I chose the color based on the fabric of our new curtains.
I decided to highlight that dark blue accent color and picked a color that was pretty similar in hue.
So, my first step was to remove all the items from the shelves and then take the shelves out as well. The shelves are just resting on L-brackets so they weren't difficult to remove.
Next, I taped off the outside edge of the nook- which proved to be a bit more challenging, especially when I got to the archway. Let's just say, there was a lot of interesting taping at all different angles to completely cover the area.
Than I began to paint. The paint I chose is called Ode to Blue, mixed at Ace. I chose a flat finish, since I didn't really need to worry about scratches or smudges on this low-traffic area. One coat left it looking a little streaky and light in some areas.
Two coats was all the space needed for complete coverage, though. The picture below was taken right after I removed the tape. I usually remove tape pretty quickly after painting, so it doesn't dry and chip off as I'm peeling.
There were a couple minuscule spots where the paint had bled a little through the tape. Luckily, Nick and I had color-matched the wall paint in our house in a paint pod sample when we first moved in. So I was able to quickly touch up these spots with a fine paint brush. I let everything dry for about 8 hours and then put the shelves back into the nook.
This time I was more thoughtful about placement of the various decor items. Rather than loading the shelves up, I surveyed everything I had taken down and chose only things I really wanted to display (at this moment).
I found homes for the rest of my things and I can easily switch things out once I get bored of this arrangement.
What do you think? I'm actually a little surprised at myself for choosing such a dark color, but am quite happy with the way it turned out. It definitely picks up the blue from the curtains and keeps the room's color scheme (of turquoise and pink) from being too girly...


1.27.2011

Easy-Peasy Curtains

As promised, I'm back today to tell you all about making curtains. I'll give you the quick and easy version, but for more detailed instructions Young House Love has a great tutorial. I've made more than one set of curtains following these steps and am always happy with how well they turn out and how easy the process is.
I started by measuring the length at which I wanted my curtains to fall. Because I wanted floor-length curtains and we have a high window, I need 100 inches of fabric for each panel. So, I got 6 yards of fabric (to have a little extra left over) from my favorite fabric store, Piedmont Fabric.
Before cutting the fabric, it's a good idea to wash it, in case it shrinks up at all.
After this, I laid the fabric out on my living room floor and basically just cut the piece in half (so that each panel was approximately 3 yards long).
Then I began to hem the fabric to make the panels. Now, I'm no sewer (although it is something I wish I could do and have vague plans to learn how from my mother), so I use iron-on hem tape for all my limited-sewing needs. This stuff is great because it holds up in the wash and bonds very well to the fabric.
I followed the instructions on the hem-tape package (as in, which setting to set the iron to and don't slide the iron back and forth, etc.).
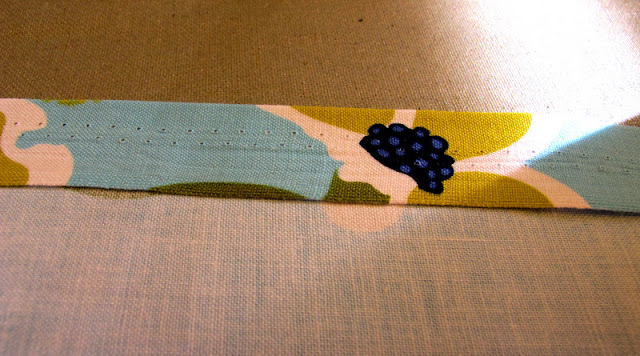
The tape lets you make nice straight edges as shown below:
After I hemmed all four sides of each panel, my curtains were finished! Since I was using some old curtain ring clips, there was no need to do anymore work. However, you could easily make the curtains tab-top by creating a pocket at the top of the panel, for the curtain rod.
Then my sweet husband hung up my curtain rod and curtains, as this little shorty could never reach above the window, even standing on our tallest chair.
This process is so easy and curtains are a great way to add some personality and color to a room, without the hassle of painting or the expense of new furniture! So...has anyone else made their own curtains??

1.26.2011

A Little Color Never Hurts...

While Nick was away enjoying the snow this past weekend, I was working on a little project known as our kitchen nook... While the nook is architecturally interesting, with its wide archway and built-in shelving, the space felt a little blah and devoid of color. Enter Jessica. As you may know my favorite colors happen to be pink and turquoise (I may have mentioned this once or twice...), but for the most part I kept these two colors separated, turquoise in one room, pink in another. Forever inspired by this site, I was emboldened to use these two colors together; in the same room.
So, I set to work this weekend, finding fabric to make curtains, painting our built-in and figuring out how to best infuse these two colors into this small space.  For all you worried that Nick didn't have a voice in the process, I can assure you he (excitedly) vetoed and approved fabric choices via picture message from afar.
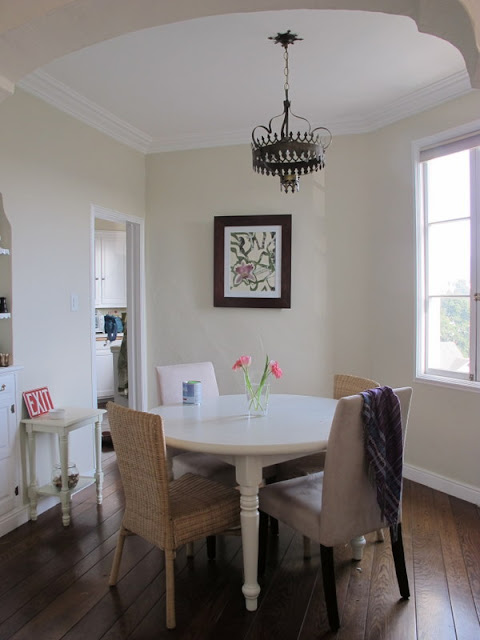
Here's a before and after of the room, as it stands right now, at about 85% completion. I realize that at this moment, turquoise is the dominant color at play but I have a few more tricks up my sleeve to bring out the pink. (My mom is sweetly sewing a couple of pink pillows for our white chairs and I'm on the hunt for some pink-ish art to make or buy to take the place of that canvas.)
What do you think? I'll be back tomorrow to share some of the steps along the way (including DIY curtains and some tricky painting).

1.25.2011

Dinner for Dos

One of my New Year's Resolutions this year was to cook more during the work week. Like other busy couples, Nick and I fell into the trap of getting to-go food several times a week. Although we usually picked healthy options, eating out adds up quickly. So, we started this year off right and have been cooking almost every night of the week this past month.
One of the most important things I've realized is to be prepared (like a boy scout)! I used to go to Trader Joe's and do a weekly shopping with some vague idea of what I could make for the week, and end up buying things we didn't get around to using.
This month, I've been planning out a menu for the entire week and only buying specifically what we need for the week. Our bank account thanks me for this forward thinking.
In a never-ending effort to keep things interesting around, I've been trying lots of new recipes. I thought I'd share one with you that we enjoyed last night.
 Pesto tossed with Arugula and Lemon Zest over Whole Wheat Spaghetti
This vegetarian meal is easy to make and is a twist on an old family favorite of mine and was adapted from a Real Simple article. Plus it looks a little fancy-pants when you serve it up!
  • To make the pesto: Mix  1 cup basil leaves, 1/4 cup parmesan cheese, 2 garlic cloves, and 2 tablespoons of olive oil in a food processor. Use more or less of each ingredient depending on how many servings you are making.  Special thank you to my sister for helping me remember the family recipe!
  • Sauté 3 cups of arugula in 1 teaspoon of olive oil until it begins to soften.
  • Grate the peel of one lemon, using a fine grater.
  • Mix the pesto with your (cooked) whole wheat spaghetti noodles and add the arugula and lemon zest. 
  • Garnish with parmesan cheese. 

Naturally we had ours with milk (our drink of choice for any and all pasta dishes) but I'm sure some wine and a nice baguette would classy-up this meal.
So, what about you? Any healthy new recipes you're dying to share? I could definitely use some more ideas...

1.24.2011

Love Letters

With Valentine's Day fast approaching, I thought I would share a love-ly art project that I made for our home. I saw something similar to this either in a magazine or online, and immediately fell in love (haha) with the idea...
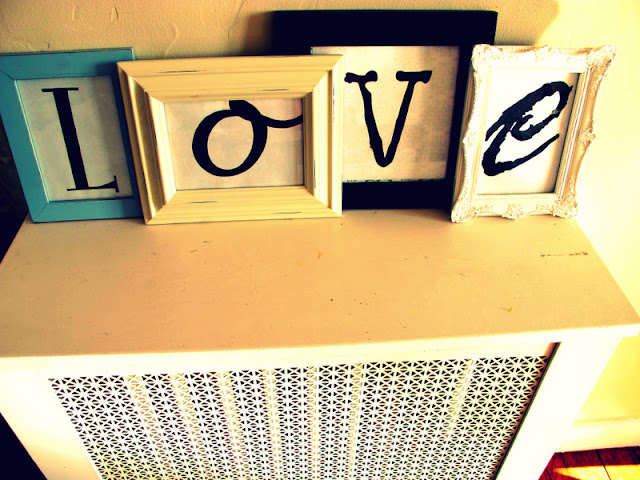
This project was simple enough and best of all- free! I started by spelling out the word "love" in Word, using a different font for each letter. Then I enlarged each letter to anywhere between 500 - 750 pt. font, depending on the font size and style. I centered the letters, one per page and printed them out on plain old printer paper.
I selected four different frames from our massive collection, that weren't fulfilling any other purpose than collecting dust in our hall closet.
Next, I used a pencil (orange colored pencil was apparently the only thing I had on hand) and traced the outline of the frame glass around each letter.
Finally, I cut out each letter and framed them accordingly.
I thought about hanging them up on a wall, but in the end I decided that they looked best in an overlapping-causal arrangement. In this case, they are on top of our living room radiator.
Love it!

1.23.2011

Silly Family

I love my little family... They're so cute!
This weekend, Nick and his friend dug a 10 foot tunnel through the snow in Truckee.
And Henry? He decided it was time to take his first shower this weekend.
Precious.

1.21.2011

Chapter 1: My cat fell out the window (again)

Hey Guys, I'm thinking of writing a book, Marley Henry & Me:
Let me tell you about how we spent Saturday night. The weekend here was gorgeous, so we threw open our balcony doors all day and the animals spent long periods outside working on their tans. We were watching Henry carefully because he fell into our downstairs neighbor's window well about a week ago. However, he showed no inclination of climbing up on the ledge again so we figured he had learned his lesson. Silly us.
The little mastermind was waiting to gain our trust. When our backs were turned, he rubbed his little paws together, laughed villainously, and scooted out of sight around the ledge of our balcony.
About 15 minutes after Nick went to bed, I heard a scratch, scratch, scratch at the window. I opened the balcony door, assuming Henry had accidentally gotten locked outside. Instead, he was balancing precariously on the 1.5 inch window ledge around the corner from the balcony, pleading to be let in. Naturally, the window swings open, so there was no way to open the window without knocking the poor guy off.
I raced into the bedroom screaming for Nick (who thought there was a bungler and leapt out of bed with amazing speed and alertness for 12:15 at night).
Nick rushed to the balcony opened the casement window to try and coax Mr. H back down the two feet of ledge to safety.
This rescue operation lasted approximately 10 seconds until Henry took one final step and wobbled out of sight.
We heard a soft thud and his pitiful cry as he landed in a neighboring yard. Of course, this yard is gated, with a locking fence at the front entrance and a 10 foot retaining wall separating our two properties.
Down the stairs and out the door Nick and I ran to survey this latest dilemma. The locked gate and dark house led us to assume the residents were either asleep, or out for the night. With no way in, Nick was forced to climb the fence to reach poor, little Henry. The least conspicuous spot to attempt such a daring climb is an eight foot concrete post located on our side of the retaining wall.
I used my mighty muscles to boost Nick up the post, which he successfully climbed, only to find out there's an additional 4 foot drop on the other side (ouch!).
Luckily, Henry's no runner, so Nick easily caught the little devil and threw handed him gently to me on the other side of the fence. Then the three of us, cut and scratched (Nick and I), bruised (just Nick), and scared (Henry) trudged upstairs to end the eventful night with a sigh of relief. Needless to say, the balcony doors have been firmly shut (despite the almost-70-degree temps) this week and Lucy is the reigning favorite pet in our household.

1.20.2011

Enjoying the View

Moving up two stories definitely has its perks...


Linked to A Beach Cottage!
Related Posts Plugin for WordPress, Blogger...
 
site design by designer blogs