3.31.2011

Three on Thursday: Luxury Living

This time last week, Nick and I were enjoying the comfort of the Ritz Carlton in Tahoe, courtesy of his company. We had a much needed vacation in a suite the size of our entire apartment. The suite boasted two bathrooms (one of them larger than our bedroom):

A plush king-sized bed
And fun "non-hotel-y" art work:

3.30.2011

Just in case...

you missed hearing about my students...

During our very rainy month of March, we've had few opportunities for recess outside. One day, we were walking to the yard as the rain took a brief break, just in time for recess. We saw the sun peaking through the overcast skies and one of my students pointed and said, "Look! I see a way out!"

3.29.2011

Snow Day Soup

Since Nick and I were essentially snowed-in to his parent's home in Truckee, we stocked up on the necessities for the weekend: cereal, milk, candy, beer, and the makings for tortilla soup. Our friends, John and Christian gave us the original recipe a year ago and it quickly became our favorite soup to make.
So naturally, with the threat of *more* snow, we decided it would be the perfect remedy for the chilly weather.
Not having the original recipe with us, we improvised, so here's our recipe of the best soup ever:

Ingredients:
1 jalapeno pepper
2 bell peppers
1 white onion
3 garlic cloves
5 medium tomatoes
1 can of corn
1 can of kidney beans

1  8 oz. can of tomato sauce
2 32oz containers of chicken stock
2 boneless/skinless chicken breasts

1 tsp of cumin
2 tsp of chili powder
1/4 tsp cayenne powder
salt and pepper to taste

Directions:

Chop up the peppers, half the onion, the jalapeno, and the garlic (we leave the seeds in the jalapeno because we like things spicy; taking them out will take away some heat).


In a big soup pot, saute the peppers, onion and garlic in 2 tbsp. of olive oil for about 10 minutes


Chop tomatoes.
Add all other ingredients to the soup pot, including raw, whole chicken breasts and bring to a boil.
Boil for 10 minutes and reduce heat to medium. Cook for another 45 minutes.
Next pull the chicken out of the pot and pull it apart using two forks, to shred it. Return it to the pot and simmer until you're ready to serve (at least 1 hour, but we've left it in all day too.)


Garnish your soup with tortilla chips, cilantro, and/or queso fresca. 
Enjoy :) 

    3.28.2011

    Snowed-in!

    Sorry for the little bloggy hiatus... Nicholas and I were gone for the better part of the week in Tahoe and Truckee, California. Because we have both been visiting the Sierras since we were little (Nick even lived there for a year of college!), we are no strangers to big amounts of snow. However, on this trip we witnessed the largest amount of snow we'd ever seen; as in 20 foot high snow banks....

    This is a typical-hight street sign, completely covered in snow:
    Nick and I in front of his parent's house:
    This is a view from the second story window of the house:
    All that snow meant that Nick had to do some of this, so that we could park our car in the driveway:
    Of course, snow is so pretty and fun to visit (and leave after a few days!):


    Makes me happy for the 70 degree temps expected this week!


    I linked this to A Beach Cottage.

    3.22.2011

    A Gallery of Sorts

    I may have mentioned once or twice that we have tons of picture frames from our old apartment, waiting to be hung up. Although our 
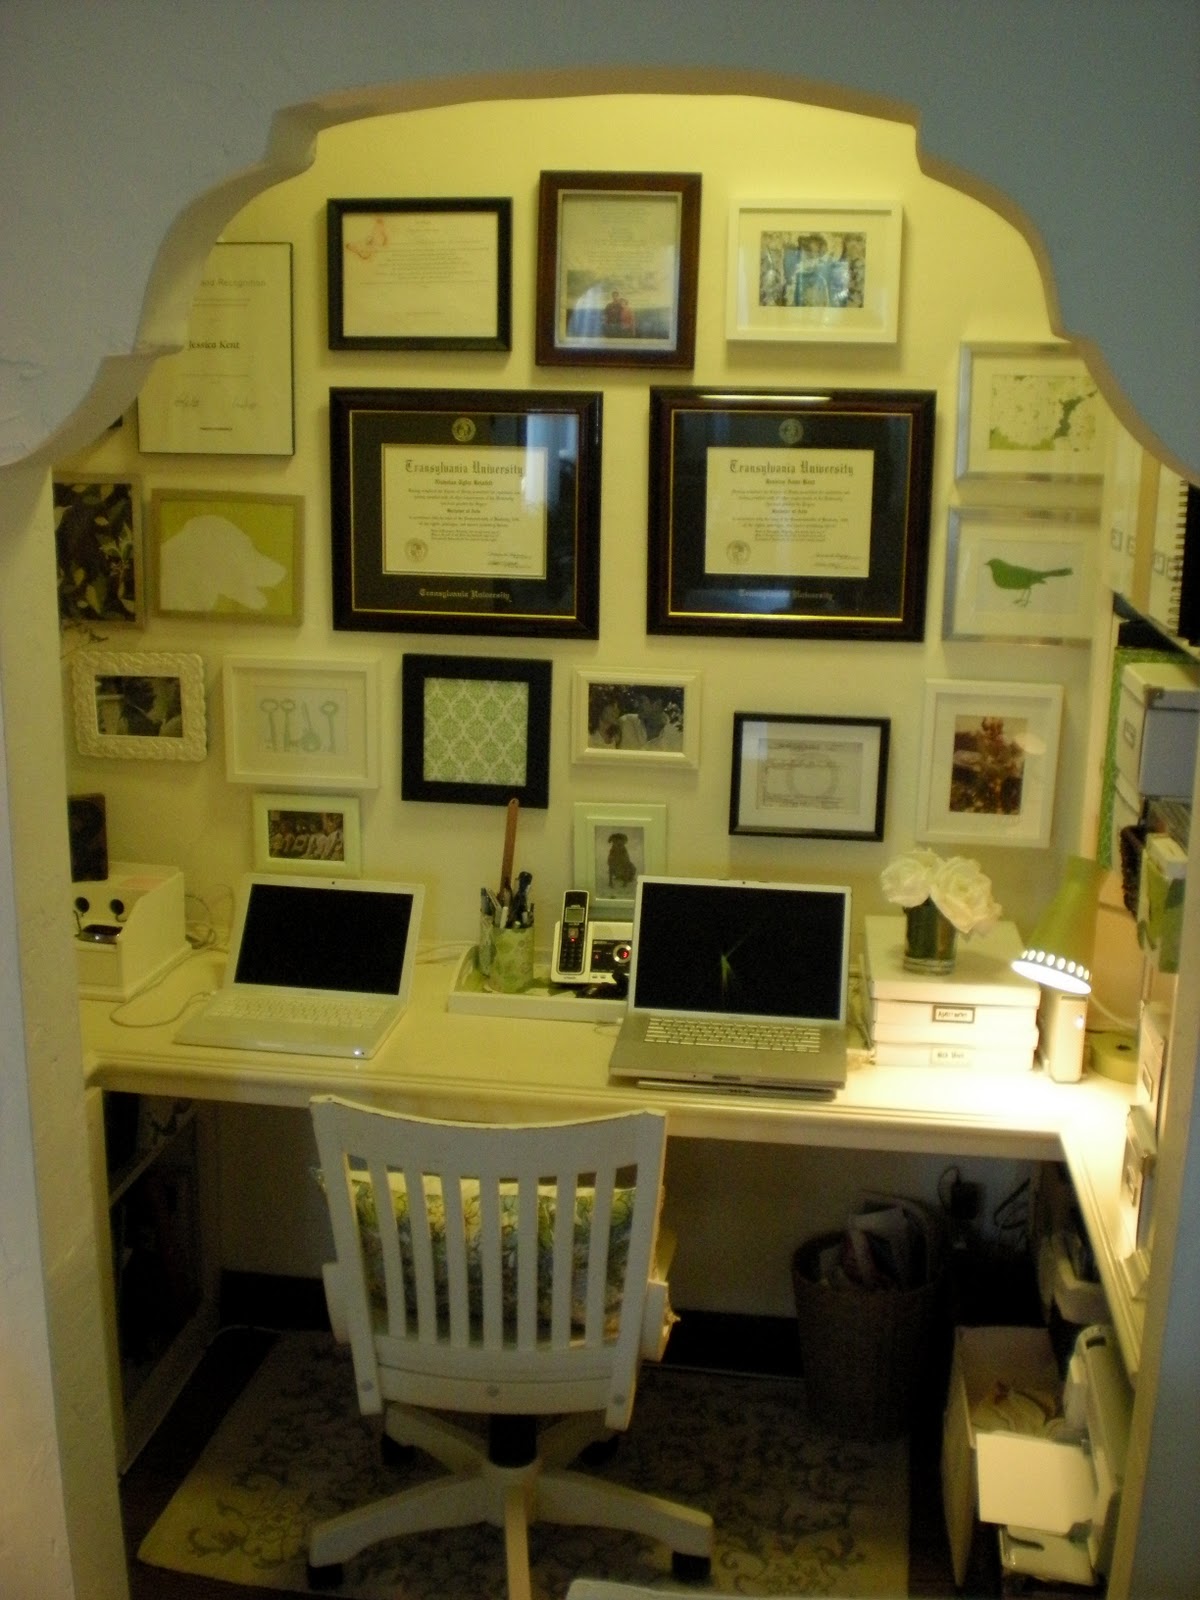
asymmetrical bedroom arrangement, LOVE project, and other rooms took care of a lot of these, we still had plenty left sitting in the closet. We knew that we eventually wanted to create a gallery wall (similar to the one in 
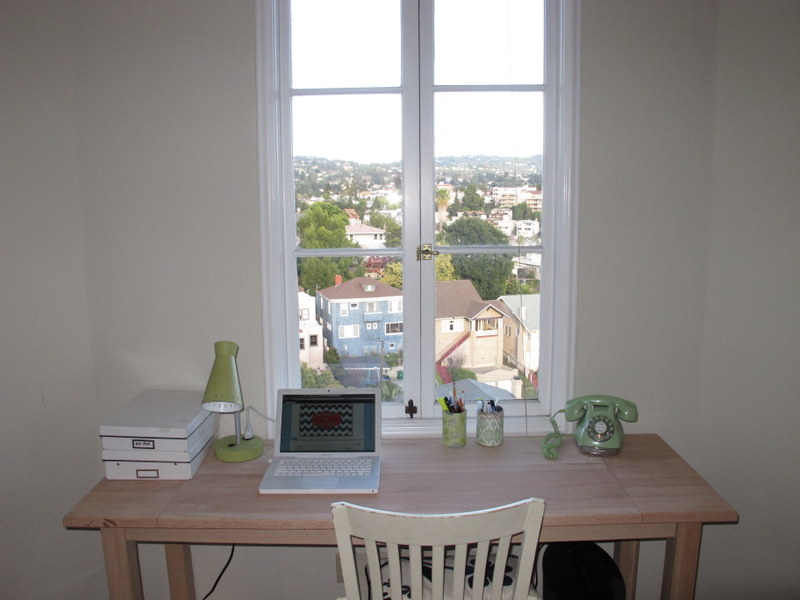
our previous office, pictured below).
    So, after noting the starkness of Mr. TV, we decided to warm things up again with a fun collection of frames.
    The first thing we did, which may not be everyone's cup of tea, was to put an empty frame around our TV. We had an extra one lying around from a picture I had painted in college. So I used some left over grey paint (from our dresser project) to paint and distress it. We secured the empty frame to the wall around the TV to make it blend in with the rest of the gallery wall.
    Next, we assembled our motley crew of pictures/frames. After reading YHL's blog 
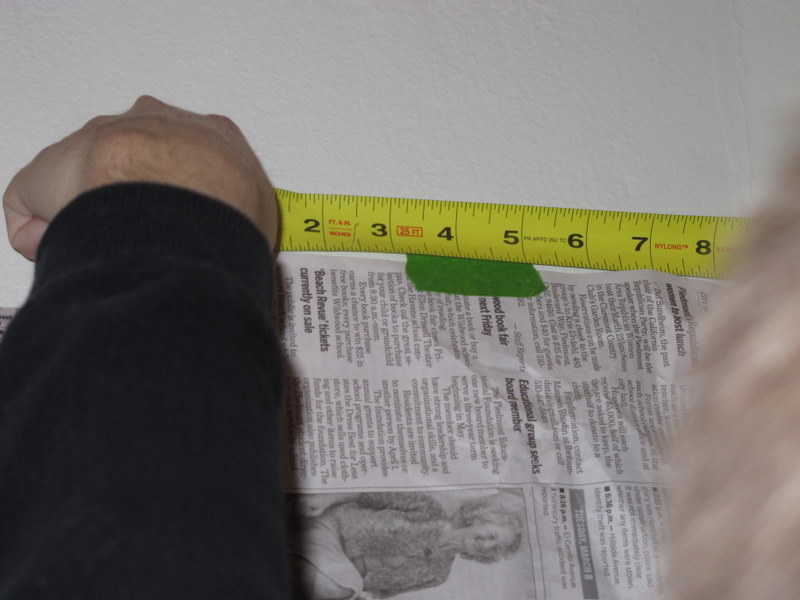
post on the subject, we decided the easiest way to hang up the frames was to do a mock up with newspaper imitations. So I laid out each frame on the newspaper, traced around it, cut out the newspaper and taped it to the wall. (rocket science!)
    This way we could play around with the arrangement and decide what we liked best, without any extra holes in the wall. When we found an arrangement that suited us, we began to hang the pictures.
    Nick measured the back of each frame and figured out exactly how far and deep in the frame the nail would hang.
    Then he used these measurements to make an "x-marks-the-spot" on each piece of newspaper. 
    He nailed the picture hook directly through the newspaper, into the wall.
    Let me tell you, this is our first experience with this method of picture hanging, and we are definitely converts. It was so easy and there were very little mistakes to be had.
    After we got all the pictures up on the wall, we ripped off the newspaper and had a complete gallery wall. (Well, almost complete- note that little piece of newspaper in the bottom right corner- we need one more frame from IKEA to complete the look, but we know exactly the proportions of the frame so we put it into the mix anyway.)
    Since we previously had nothing on the walls in this room, the gallery wall is quite an improvement. The different color and size frames give it a collected-over-time-look that we love.
    If you're wondering what is actually in the frames, I'd be happy to share. There's nothing too exciting; just little things that are special to us. For example, we framed a fortune from a Chinese fortune cookie that we've been holding onto for 2 years, a picture Nick painted in elementary school, my vintage elephant print from the flea market, Ms. Lou, Nick's pilot's license, a picture of our first dance, and our college diplomas. We added some filler pieces too that can easily be changed out when something more meaningful comes along. Plus, since we stopped at the top of the TV there's always room for some upward-frame-mobility in the future...
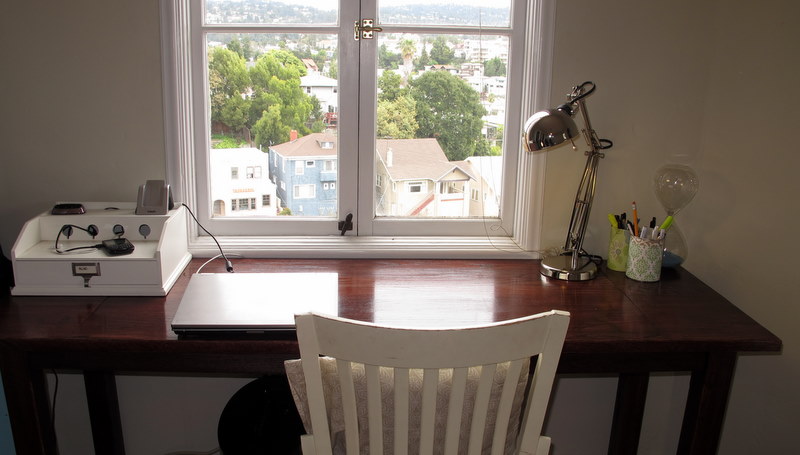
    Here's a picture of the new gallery wall and how it fits in with the rest of the room. As you can see, things are coming along up here and this is quickly becoming one of our favorite rooms in the apartment.
    *note: the TV is not actually off-center in the frame, it's just the angle from which I'm taking these pictures! 

    3.21.2011

    Boy Toy

    Despite what you may think, I don't make ALL the decorating decisions in our home (maybe just 95% of them...) Even if I tend to mastermind more of the ideas, we definitely talk over each and every decor decision (and no, Nick's eyes don't glaze over during these conversations) and he approves and helps in execution.
    Anyway, this latest addition was all Nick. We purchased a small 20 inch TV for our upstairs tower room; something for guests, movies in bed, or when we just can't agree on what to watch. I'm not a huge fan of TVs in the bedroom, but I figured there wasn't any harm, since it's not actually our bedroom.
    We decided to mount the TV on the wall above the dresser. 
    I'm not a big fan of cords showing, so Nick cleverly hid them in wiremold and then painted it the same color as the wall.
    The TV looked a little lonely on that wall all by himself, so this past weekend, we added a few more friends and tried to help him "blend in" to the room a little bit better...But, more on that tomorrow!

    3.18.2011

    desk es finito

    Remember the desk that Bob the Builder built us last month? Well, after living with the unfinished product for a couple weeks, we made weekend trip to ace to pick out the perfect stain color. 
    We chose Red Mahogany, because we wanted a rich color that would bring out the wood grain and stand out in the room.  I've only ever used Minwax, so I can't really compare it to other stains, but I am always pleased with the coverage, end result, and how true to color their stains are. 
    Since Nick had already sanded the desk, we skipped step one and prepped an area in the upstairs room for staining. Since stain can have a strong odor, staining outdoors is usually the best option. However, there was no way in heck we were moving that downstairs and outside, so we opted for opening up all the windows and hoping for the best!
    The first thing to remember when staining, is to make sure to stir your stain really well so that color doesn't separate or settle on the bottom of the can. Miniwax recommends a test stain on a out-of-sight piece of wood, but knowing how true to color these guys tend to be, I skipped this step and got straight to work. 
    I used a two-inch wide brush to brush in the stain in the same direction as the wood grain. I also applied the stain with light pressure to get a smooth, even top coat. 
    I resisted the urge to go back and touch up any lighter looking areas, since you are supposed to let you stain dry before you put any additional coat on. 
    After staining the entire desk, I waited 15 minutes and then took a rag to wipe off any excess moisture. The 15 minute wait time gave the desk a nice saturated look, without it getting too dark. 
    After staining, we let the desk sit and dry for 24 hours. In this case, one coat of stain was all it took for us to achieve the perfect color. 
    Next, I picked up some satin polyurethane to coat the desk with. We wanted to make sure the desk was sealed well since it was going to be getting a lot of use. We also chose satin instead of gloss because we didn't really want a super shiny desk. I used a foam brush to apply a light coat of sealer to the entire desk (again in the direction of the wood grain).
    We had another 24 hour wait time for the first coat of sealer to dry. Then, I sanded the desk lightly, using 240 grit sand paper. (Although this seems counter-intuitive, it's an important step to ensure your finished product is smooth and polished.) 
    After wiping off all the sanding dust, I gave the desk one final coat of sealant and called it a day. 
    We gave the desk plenty of drying time before putting our computers and such back on top. We've been using our new and improved sealed desk for about two weeks now and we love it! We're so happy with the shape, the color choice, and the workspace it has provided us!
    Now, time to accessorize!

    3.16.2011

    Entry Hall Switcharoo

    I know, I know we've lived in our apartment for a little over two months and I'm already switching things around. What can I say; rearranging furniture has always been a favorite pastime of mine...
    Let's take a looksy at the "before" situation:
    Not bad, but I wasn't loving the bench + coat rack combo. Somehow it fit in much better in our old apartment than in this current one. However, I really had no big plans of changing it yet.
    A couple of weeks ago, we came home to find our homemade coat rack had crashed down to the bench. Neither Nick or I had the inclination to put it back up, since we weren't in love with it... However, the bench by itself wasn't doing it for us either...
    Long story short, I was at a thrift store perusing their limited furniture section and a narrow wooden cabinet caught my eye. I excitedly texted Nick to say, I found a replacement for the bench; do want to go check it out after work? His response, "Go. Buy." Such faith that man has in me!
    Anyway, we unloaded the piece and set up a mock display in the entryway, just to see what we thought.
    It fits perfectly!
    It doesn't impede the walkway anymore than the bench did and it offers some serious interior storage (perfect for hiding away someone's gigantic laptop bag each night...). My furniture guy, who inspects all nooks and crannies for me, declared the inside wonderfully spacious. 
    Which means... I have another painting project to keep me busy. How delightful! 
    (Don't feel sorry for the bench, he got to join the party upstairs where all the cool kids hang out...)

    3.15.2011

    Green-ness

    A while ago, I read how my friend Christian made a succulent terrarium using apothecary jars from her wedding. Although, I really liked her finished product, the idea slipped into the back of my mind until I was looking around Pottery Barn and saw that they had also used tons of glass terrariums in their new spring display. (However, unlike Christian's display, PB was using fake plants...)
    After finding my $10 glass hurricane at Marshall's I picked up several succulents from Ace and got to work.
    I filled the bottom of the hurricane with soil and then planted my succulent in the  base of the hurricane. Next I used some polished stones from my rock collection (ooor my dollar store vase filler) to ground the arrangement.
    And that's all, kids. This little project was easy-peasy!
    I  added two IKEA lanterns on either side of my new terrarium and used corks from all the wine Nick and I consumed in the last two days years, as a filler. 
    I love this new centerpiece for three reasons:
    a.  Like I mentioned it was super easy and cheap to make. (Two of my favorite adjectives...)
    b. It's not going anywhere for a while; succulents are pretty hard to kill, even for a black thumb like me!
    c. The hurricane is so tall that Mr. Henry can't possible reach inside to ruin yet another arrangement (unless he gets Lucy to help, but she's kind of a goody-goody so I think I'm safe.) 

    Thanks to Christian for such a great idea! 

    Related Posts Plugin for WordPress, Blogger...
    Related Posts Plugin for WordPress, Blogger...
     
    site design by designer blogs